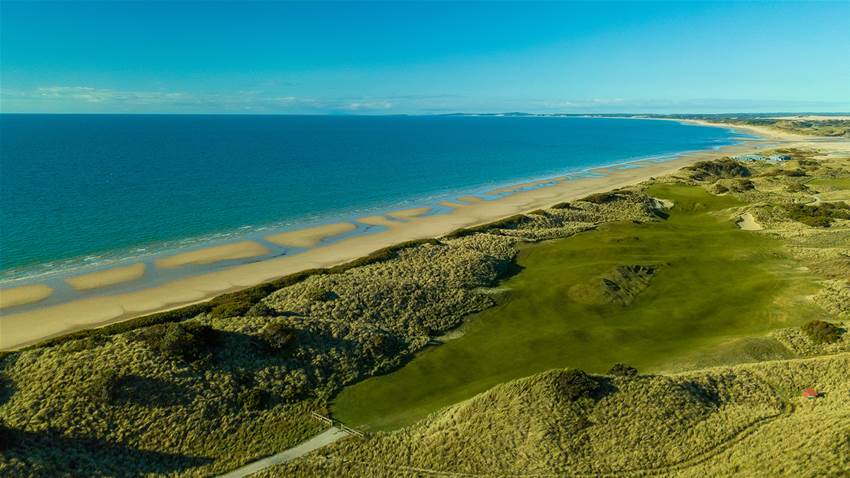
The best long two-shotters test a player’s ability to execute a pair of classy long shots. At the same time, they show off interesting strategies most often built around a green benefiting a shot played from a particular part of the fairway.
KOOINDAH WATERS GC
354-metre, 9th hole
The strategy here is determined by a vast wetland that separates the right edge of the fairway and the green beyond. There are two bunkers left of the fairway to catch the over conservative, so the best play is to take the risk by hitting your tee shot close to the hazard to leave a short approach into the green.
LONG REEF GC
391-metre, 17th hole
Situated anywhere else in the round, the 17th would lose much of its impact. But with the clubhouse in sight and a narrow fairway lying between out-of-bounds stakes left and thick rough covered mounds right, the previous good work over 16 holes can be destroyed here. The wind often blows strongly from the left making accurate shots tough, even into a bunkerless green.

MAGENTA SHORES G&CC
381-metre, 14th hole
A gorgeous dogleg left par-4 that requires a long and precise tee shot to avoid the bunkers left and on the crest of a hill. From the top of the hill, the second shot is downhill to a large, undulating putting surface, guarded by two deep bunkers short and another two to the right.
MOLLYMOOK GC – HILLTOP COURSE
358-metre, 10th hole
There is just the slightest hint of the famous 10th hole at Augusta National about Mollymook’s back nine opener – and it’s all about the steep descent from tee to green. It is this from the highest point on the course to the lowest, via a dogleg left fairway, that shortens this hole considerably. The ideal drive turns a little from right-to-left to leave a short- to mid-iron to a relatively flat green.
NAROOMA GC
369-metre, 13th hole
Arguably the most difficult hole on the course where a blind tee shot, over the crest of a hill, must finish short of the dam lying to the left of the fairway. For longer hitters a fairway wood or long iron are better options to stay out of the hazard. The shot to the elevated two-tiered green is particularly difficult because of the uphill approach from a downhill lie.
NEWCASTLE GC
368-metre, 5th hole
The first of a great triumvirate of holes at Newcastle that are the highlight of any round.
A dogleg left over a hill where a good drive will roll down into a swale to leave a testing mid- or long-iron approach to the green. Into a stiff southerly breeze, a fairway wood might be required to reach the green. Bunkers left and right protect the upturned saucer green.

NEWCASTLE GC
367-metre, 6th hole
Newcastle’s 6th hole heads into the opposite direction to the 5th and can be often played downwind, which brings a large hill to the left and the scrub to the right, into play. The fairway narrows slightly as it turns around the hill and climbs toward the green perched atop another hill.
NEW SOUTH WALES GC
376-metre, 7th hole
This is a demanding but fair uphill par-4. The prevailing wind tends to sweep from behind your left shoulder on the tee, pushing shots towards dense scrub and sand dunes lying to the right. Find the heart of the fairway and it’s still a long iron up to a monstrous green that slopes markedly from back to front with a tier through the middle for good measure. Wander more than 10 feet past any pin position on this green at your peril.

NEW SOUTH WALES GC
375-metre, 13th hole
This dogleg left par-4 signals the start of one of the best stretches of holes in Australian golf. A genius dogleg left where driver can put you through the point of the dogleg into trouble, or into A-1 position when correctly shaped. On the approach, the fairway drops away before rising to the plateau green - in effect, it’s a level shot but appears uphill. A heap of options on the second shot – fly it in, run it – make it one of the most fun holes in Australian golf.
NEW SOUTH WALES GC
372-metre, 15th hole
Mike Clayton describes this as one of the toughest driving holes in Australia. A stiff wind blowing in your face as you stand on the tee is enough to break your spirit. There is no room for error left or right of the fairway and you have to strike your drive long enough to reach a point where you can see the green.”
ROYAL CANBERRA GC
371-metre, 10th hole
Strategic design is perhaps best defined where a player who hits close to a hazard is rewarded with a slightly easier approach shot. This applies here at the split fairway 10th. Those capable of driving over the bunker to the right gain the benefit of a little extra run and a better line to a green defended on the left by bunkers.
ROYAL CANBERRA GC
399-metre, 14th hole
Arguably the most dramatically improved hole out of the OCCM redesign a few years ago. Multiple playing lines along this really wide fairway provide options for all players. Short hitters can play well left off the tee, but anyone wanting to hit the green in two have to take on some element of danger. If the pin is on the right, the left side fairway bunkers guard the best line. Conversely a left pin is best approached from the right of the fairway, which requires flirting with the water. For those choosing the most direct route, the central fairway bunker must be negotiated.
ROYAL SYDNEY GC
383-metre, 4th hole
This is the first difficult two-shotter on the course and it plays down from the tee then turns to the left and goes up to the green at the high point of the hill.
Trees both left and right narrow the fairway at driving length and those driving left to the inside corner of the dogleg are confronted with a number of trees just off the fairway that block the view of the green. There is a mix of small and massive bunkers – two short, two left and one right – of the green that must give the members serious grief.
 ST MICHAEL’S GC
379-metre, 16th hole
From the tee, only a sliver of fairway is visible beyond the infamous Moran’s gully, which is full of banksia and other seaside shrubbery.
The best driving line to the diagonally set fairway is straight at the trees to be spotted through the gap to leave the shortest approach into the green (pictured right), which slopes markedly from right-to-left.
STONECUTTERS RIDGE GC
370-metre, 14th hole
The hole descends from the tee into a valley where the driving area narrows between a tall tree right and a fairway bunker left. Hit your drive near the tree and you will be left with a short iron to an elevated, dramatically tiered green. Any approach beyond the flag will leave a treacherous downhill putt.
TERREY HILLS G&CC
389-metre, 10th hole
A demanding dogleg left hole where water flanks the entire left side en route. There is plenty of room to the right from the tee, although the approach from this side can be three clubs longer than from a risky blow dicing with the bunkers on the inside corner of the dogleg.
THE AUSTRALIAN GC
430-metre, 16th hole
When Jack Nicklaus redesigned The Australian in the mid-1970s, he made sure the closing stretch of holes would be drama-charged excursions for professionals and the club’s members. Redesigned again more recently, it remains a tough customer. The north-south routing of the hole subjects it to the strongest head and tailwinds, which brings the bunkering greenside very much into play, with the sand on the approach to the green the defence of the hole.
THE COAST GC
392-metre, 14th hole
The first challenge is to successfully carry the cliffs and rocky sea inlet that separate the tee from the start of the fairway. Into a strong southerly it takes a mighty blow to reach safety. The narrow fairway is wedged between the out-of-bounds cliff to the left and rough-covered mounds to the right, so accuracy here is paramount.

THE LAKES GC
365-metre, 1st hole
From the elevated tee, players need to select a diagonal line to carry over the edge of the lake to the left, so as to avoid the high sand dunes and a lone bunker right, to find the safety of the fairway. Club and shot selection into the green is important, especially to avoid the bunker through the back of the green.
THE LAKES GC
396-metre, 16th hole
Like so many of the holes on The Lakes’ back nine, water plays a major role on the way you tackle the hole. From the tee, the drive is semi-blind and hides water that can be found right and through the end of the fairway, before it turns left to right around the hazard and heads for the green. It’s a hole that asks for two perfect shots, especially the left-to-right second into the green.
Related Articles

May 2026 Golf Australia magazine: on sale now
Video Lesson: Chipping loft drill for feel and fun


